Friday, 20 December 2013

Strengths, Weaknesses, Opportunities and Threats

Strengths
  • Using a range of camera angles
  • Having the scenes mapped out in my head before starting

Weaknesses
  • Not planning ahead with plain creation, causing the animation to be slightly robotic
  • Not using a wide range of lights
  • Not linking each scene together to create a fluid scene change 
  • Limited textures on my models 

Opportunities
  • Learnt how to create a glow effect 
  • Learnt how to create a explosion of polygons with a mesh

Threats
  • Not having time to create new models
  • Not having all the knowledge to create the effects that I desired

Thursday, 19 December 2013

scene 9 and final animation

Again like scene 8 there is a lot of things happening in this one scene that is why there is only a simple omni light used within the scene. The models and camera again are following a path that I created, also the x-wings wobble again but also darth vders ship spins out of control when a tie fighter hits in to it. I chose this high up camera angle to show all the aspects of the scene, the camera then gets closer to darth vaders ship as it is about to be hit then it follows it as it is spinning out of control. I chose this as it represents what happens within the movie scene but with time constraints I could not create the millennium falcon that is used in the real movie scene. 


Final animation 

This is my final 30 second animation that I have created and put together with windows movie maker.


Tuesday, 17 December 2013

scenes 7 and 8

Within scene 7 I have used an omni light again but I decided to try the inverse square decay option within its modifier tab, this allowed me to control how far the light would travel and at what intercity. The model and the camera are again following a path created to provided them with forward motion within the scene, also by using fey frames I have animated the models and camera to act as if there was turbulence so they wobble around. I chose this camera angle as it provided me with the best representation of the tie fighters and darth vader being right behind the x-wings and are ready to attack.


scene 8 
Within scene 8 I decided to revert back to using a simple omni light as I did not get the required affect that I wanted from the previous scene. The models and the camera again are following a path that I created to give a sense of movement in the scene, also the x-wings wobble during the scene to create the idea that they are under attack. I have also included lasers that follow a path and hit one of the x-wings but there is not an explosion affect as it was to time consuming to implement. I also used the bomb modifier effect to simulate one of the x-wings crashing in to a wall. 
  The camera angles that occur in this scene where actually created by accident when I was testing where I should put the cameras key frame to end on its path, even though this came about by accident I believe that it is still impact-full as it follows the laser to its target then the camera shows the tie fighters casing and the x-wing crash then the camera reverts back to the x-wings fleeing all within one scene.   


Sunday, 15 December 2013

scene 5 and 6

Within this scene again I have used a simple omni light to light up the scene, the camera I am used was a target camera but it was not moving down a spline like in previous scenes. I chose to used this type of camera because it allowed me to get the affect that you are the guns tracking the ships as they pass. The x-wings simply follow down a sight spline to emphasis the speed. I chose this camera angle as it was used in a similr way within the movie to show the tie fighters chasing the x-wings which can be seen in scene 6. 


scene 6 


Scene 6 is a replica of scene 5 apart from the models that are used, this is because I wanted the exact same affect that I created with scene 5. This camera angle was used again because I wanted to seem as if the tie fighters and darth vader was following the x-wings exact moves.


Thursday, 12 December 2013

Scene 3 and 4

In preparation for the following scenes within my animation I had to create a section of the death star trench that I could copy to create a small representation death star trench without create the whole thing. 

Within my 3rd scene I also used an omni light because there was no need for special light effects again, this though I have used a target camera that track the middle x-wing and travels down a spline as if it was traveling with the x-wings. 
  I chose this camera angle as it present the x-wing as a dominate aspect of the scene as they are about to enter the death star trench on a mission to destroy it. 


scene 4
This scene is very similar to scene 3 as they are both portraying ships entering the death star trench but for different reasons. This scene also only uses an omni light to illuminate the whole scene because there was no need to have different lighting. 
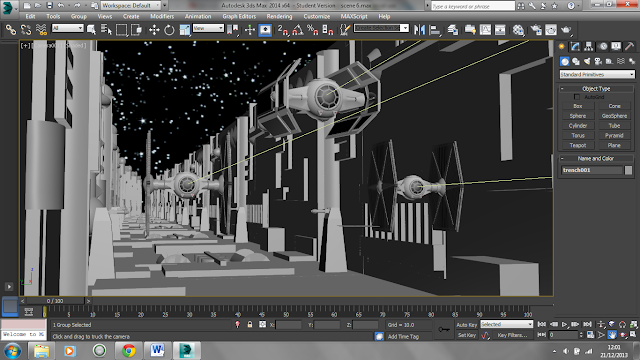
 I chose this camera angle as it shows the dominance of the tie fighters and darth vader within the scene but for a different reason then why the x-wings where dominate, the tie fighters are seen as dominate in this scene because they are stalking the x-wings in to the trench to go and destroy them.  


Tuesday, 10 December 2013

Engine glow research and scene 2


This video enabled will enable me to create a engine glow effect on my x-wings and also if I decide to create any lasers then I could also use this technique. This video does not just give a tutorial on how to create a glow but that was the only aspect in which I will be using in future scenes.

Scene 2

Within scene 2 I only used an omni light withing the scene as there was no need for fancy lighting effects as it was more about the actions and camera angles that would create emotions. The x-wings within this scene are simply traveling down a straight spline towards the death star, but also the ships become smaller the closer they get to the death star to show there speed but also to show how big the death star is in comparison.
   
The camera also has an animation that gives the effect of the x-wings passing a speed and causes the camera to shake. I have used this camera angle because it empathizes the size difference and speed difference between the x-wings and the death star which I feel is what the scene from the movie creates as well.


Friday, 6 December 2013

Reaction manager


Reaction manager allows you to animate two objects at the same time with the same reactant, this allows you to create a sliding door effect when a character walks up to it. When creating my scenes I will not be using this technique as I do not need objects to react with each other, and the animation that I do require can be performed by key frame animation.   

Tuesday, 3 December 2013

Scene 1


This is my first scene that I have created, as you can see there are a lot of lighting and other aspects of the scene. Firstly the lighting, I have used multiple target spot lights to create the effect of a sun shining on to the planet of Hoth. Also within the scene I have used omni lights close to the 3 x - wings to keep them illuminated throughout the scene. I used a target camera that is stationary that tracts the middle x-wing, I chose this camera angle because it best represented my take on the scene of the x-wings leaving Hoth within the movie.
You may notice within the animation below that the x-wings become darker when they pass the camera where the metaphorical sun would be, this is to give the affect that the camera is actually a solid object that is watching the event and causes the light to be blocked.